You’ve been assigned a Prospr Mission - now what?
Joint Missions help make checklists easier and keep tasks organized. They’re used for things that repeat, so everything gets done the same way each time. This helps everyone stay on track, know what to do, and check things off as you go.
You’ll receive a notification when a mission you belong to launches.

1a) You can click the notification to access the mission directly.
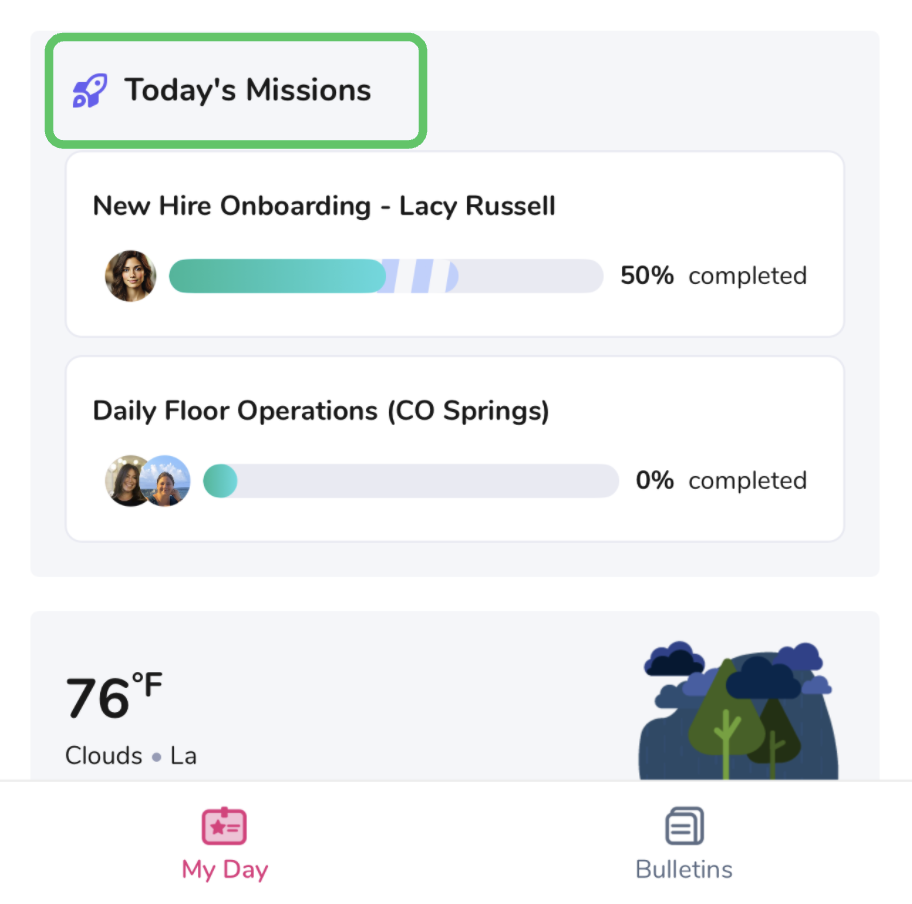
1b) Open the Prospr app and navigate to “My Day”. You’ll have a section for “Today’s Missions”.
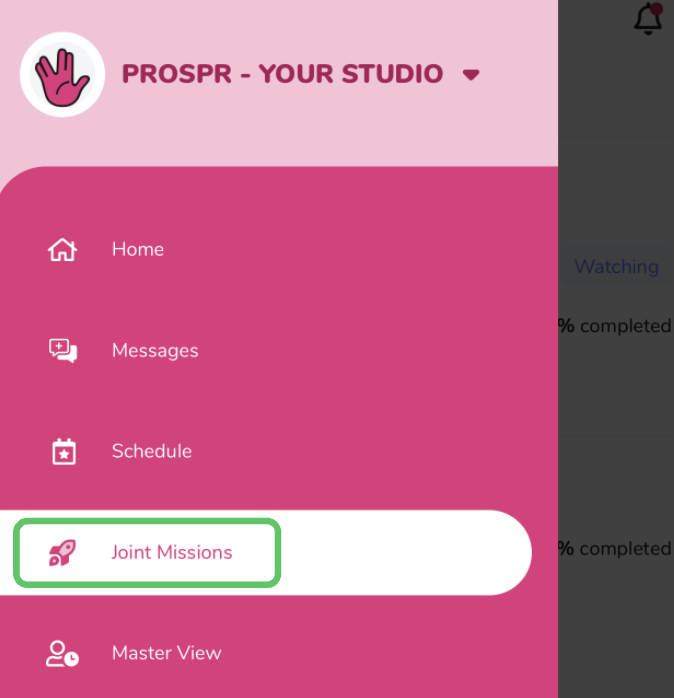
1c) You can also find missions under the menu > Joint Missions.

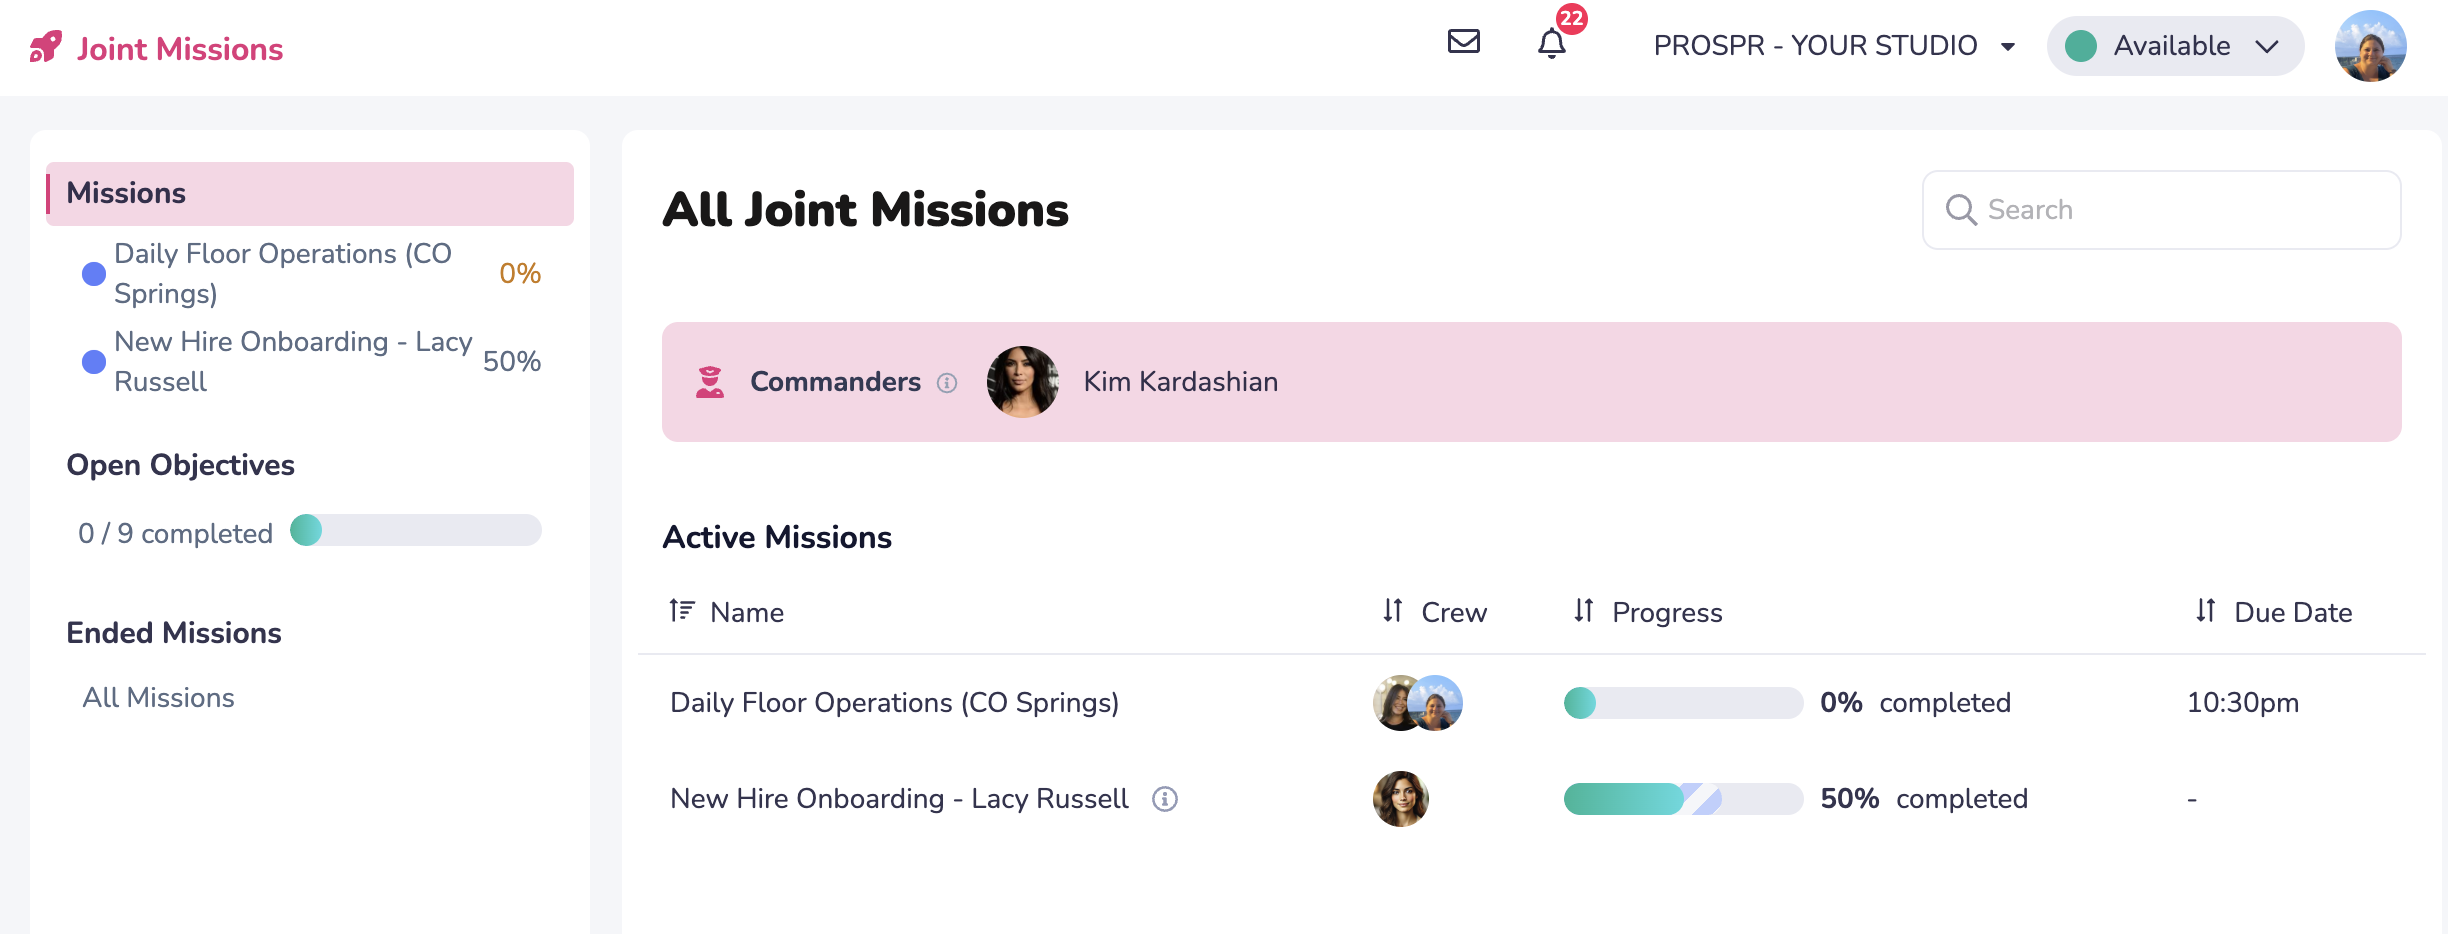
2) Review your Joint Missions through Mission Monitor and click into an individual mission to begin working on it.
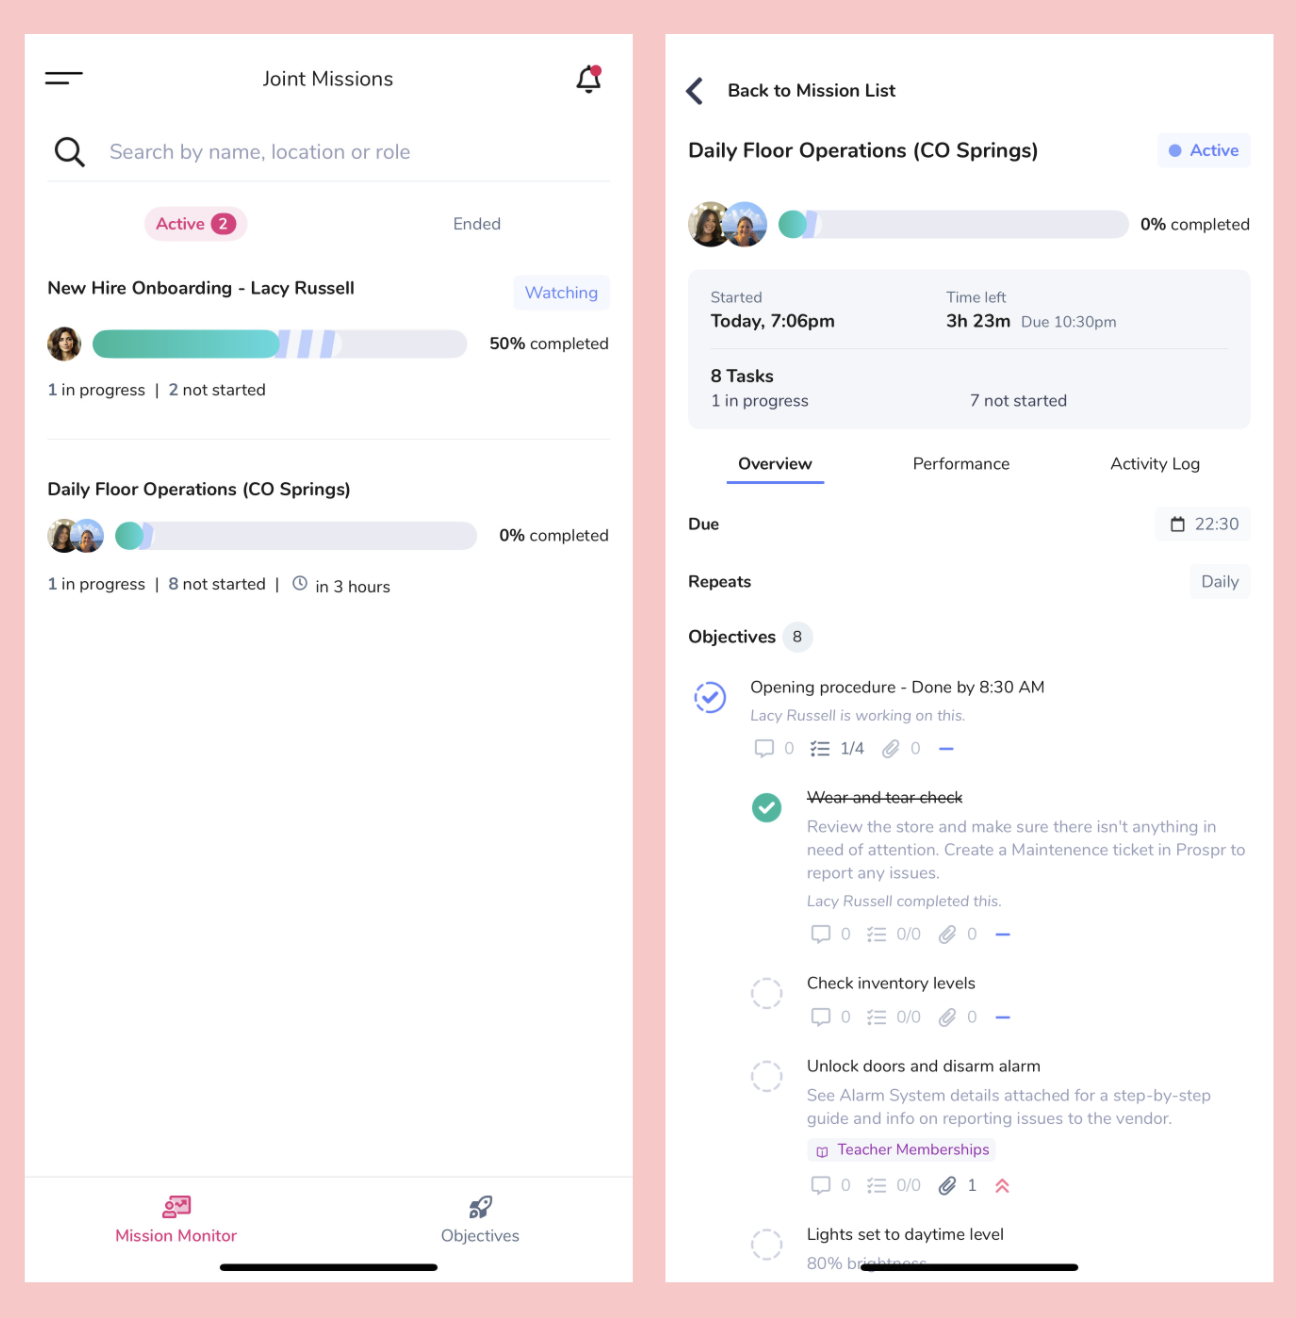
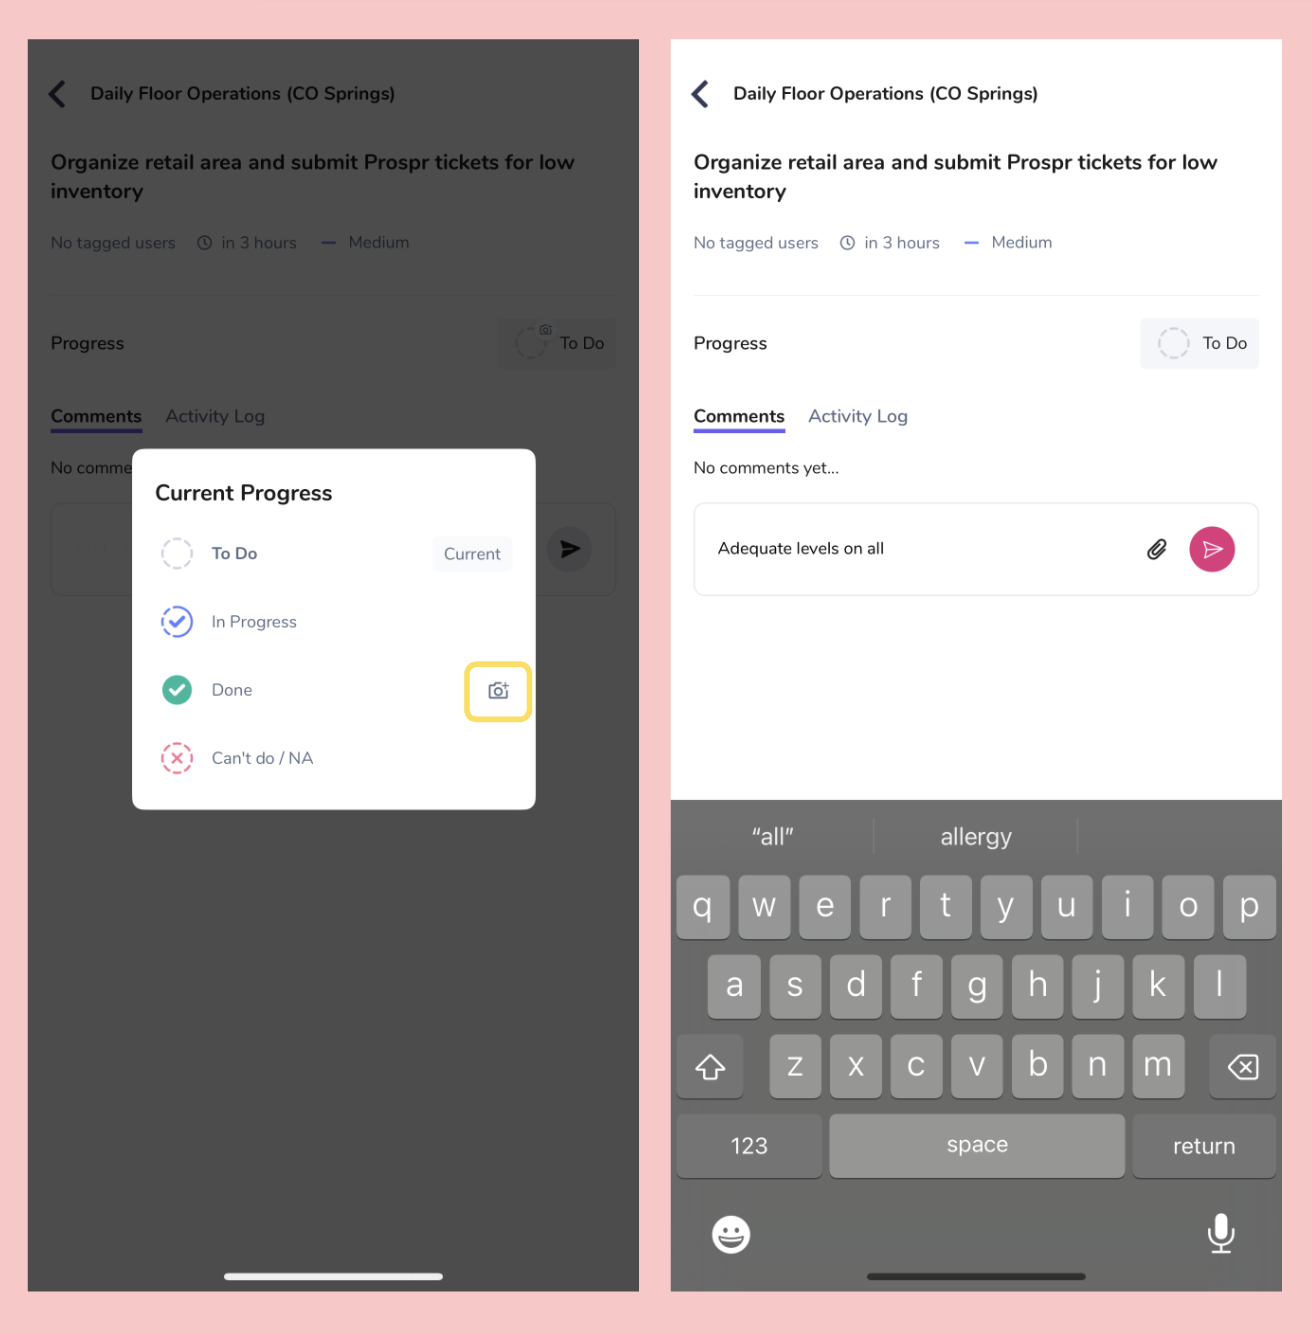
3) Click on the bubble next to each objective and subtask to change its status. In some cases, your company may require a photo to be attached before you can mark an objective as “Done”. You’ll see a small camera icon when this is the case.
Click any objective or subtask to view the task description, comments, add your own, see activity history, or upload attachments and photos.

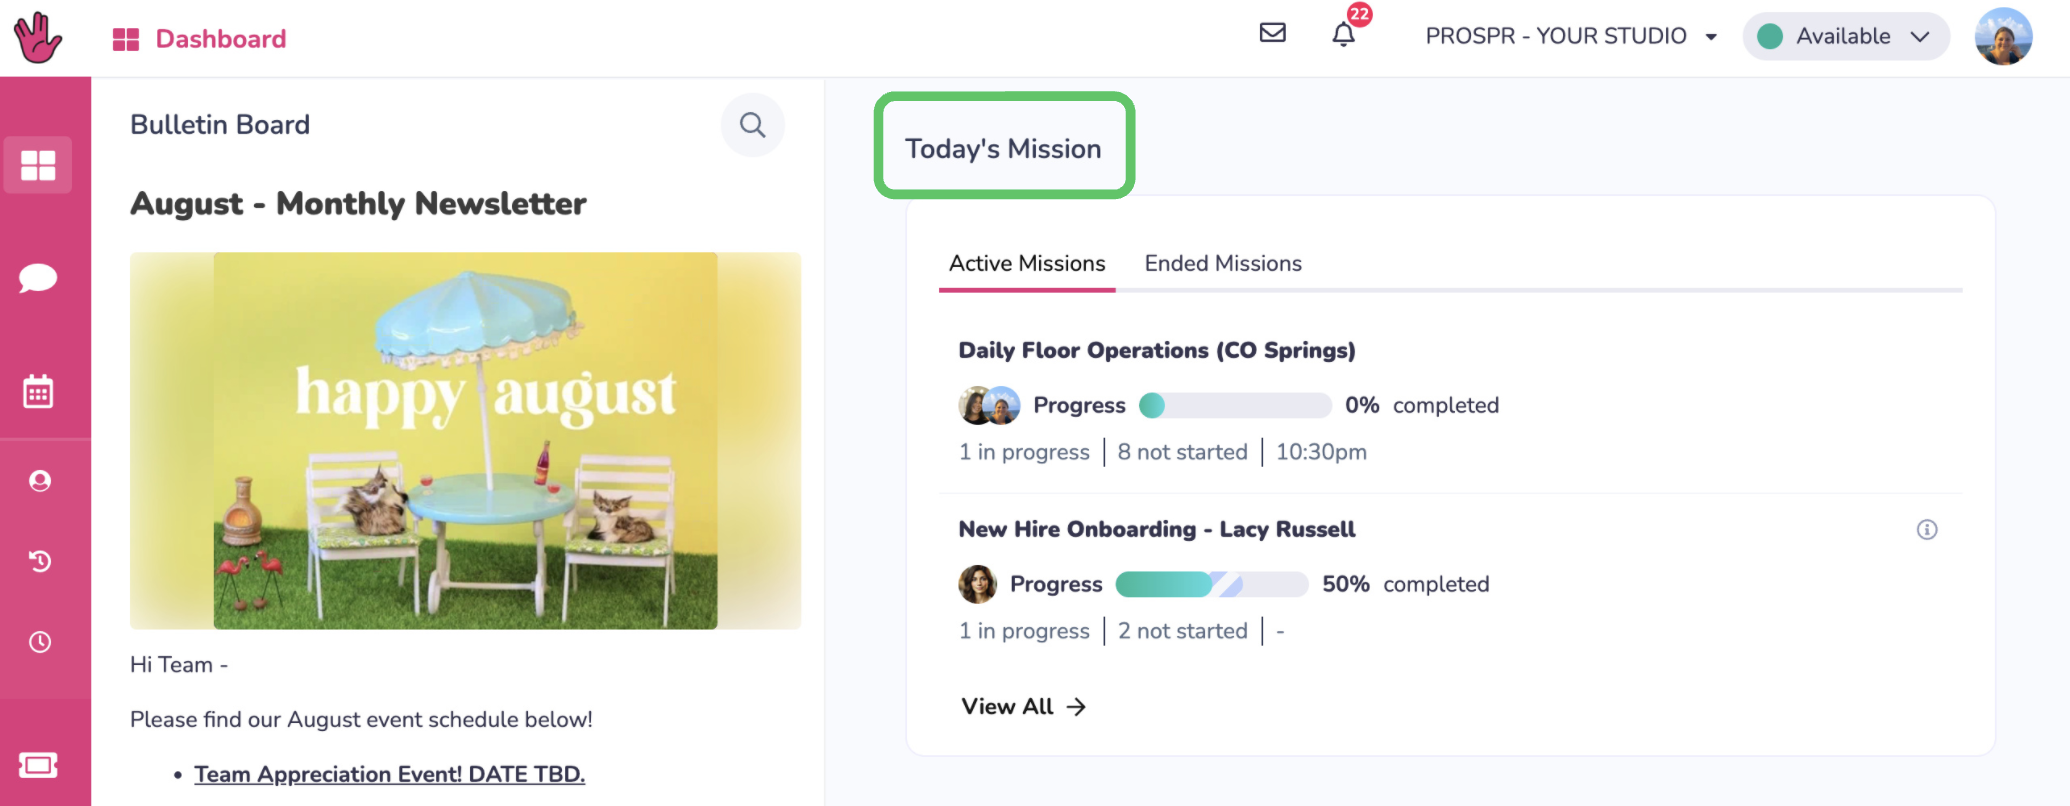
1a) You will have a “Today’s Missions” section on the right-hand side of your Dashboard.
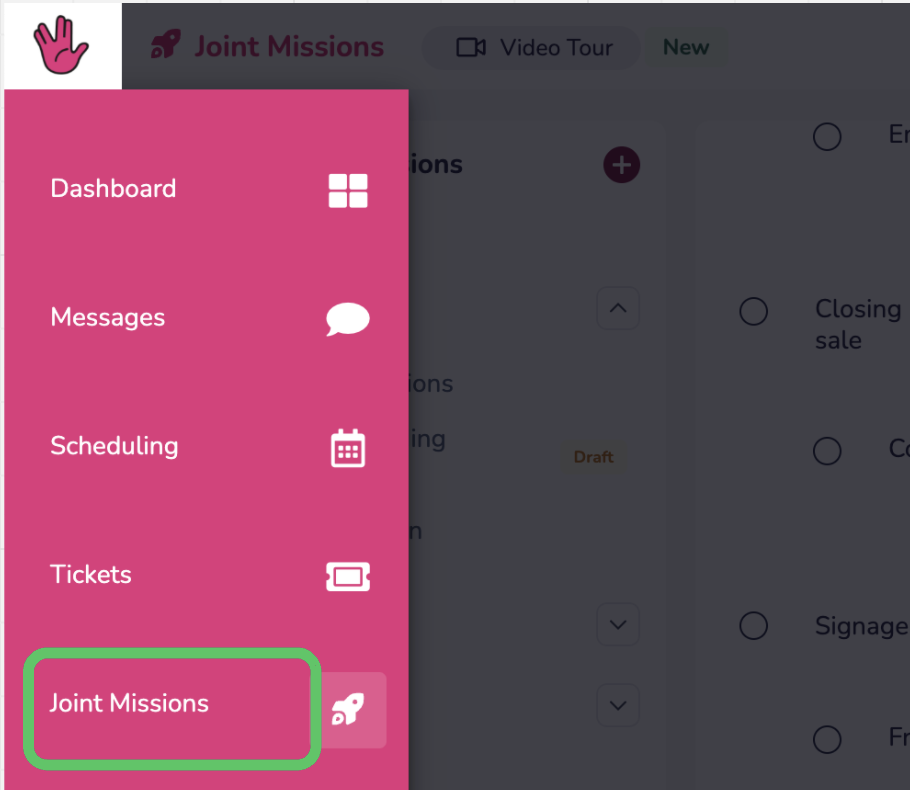
1b) Open your left panel to "Joiny Missions".
2) Find your open Missions with the blue “active” indicators. Click on a Mission or the “Open Objectives” section.
3) Click on the bubble next to each objective and subtask to change its status. In some cases, your company may require a photo to be attached before you can mark an objective as “Done”. You’ll see a small camera icon when this is the case.
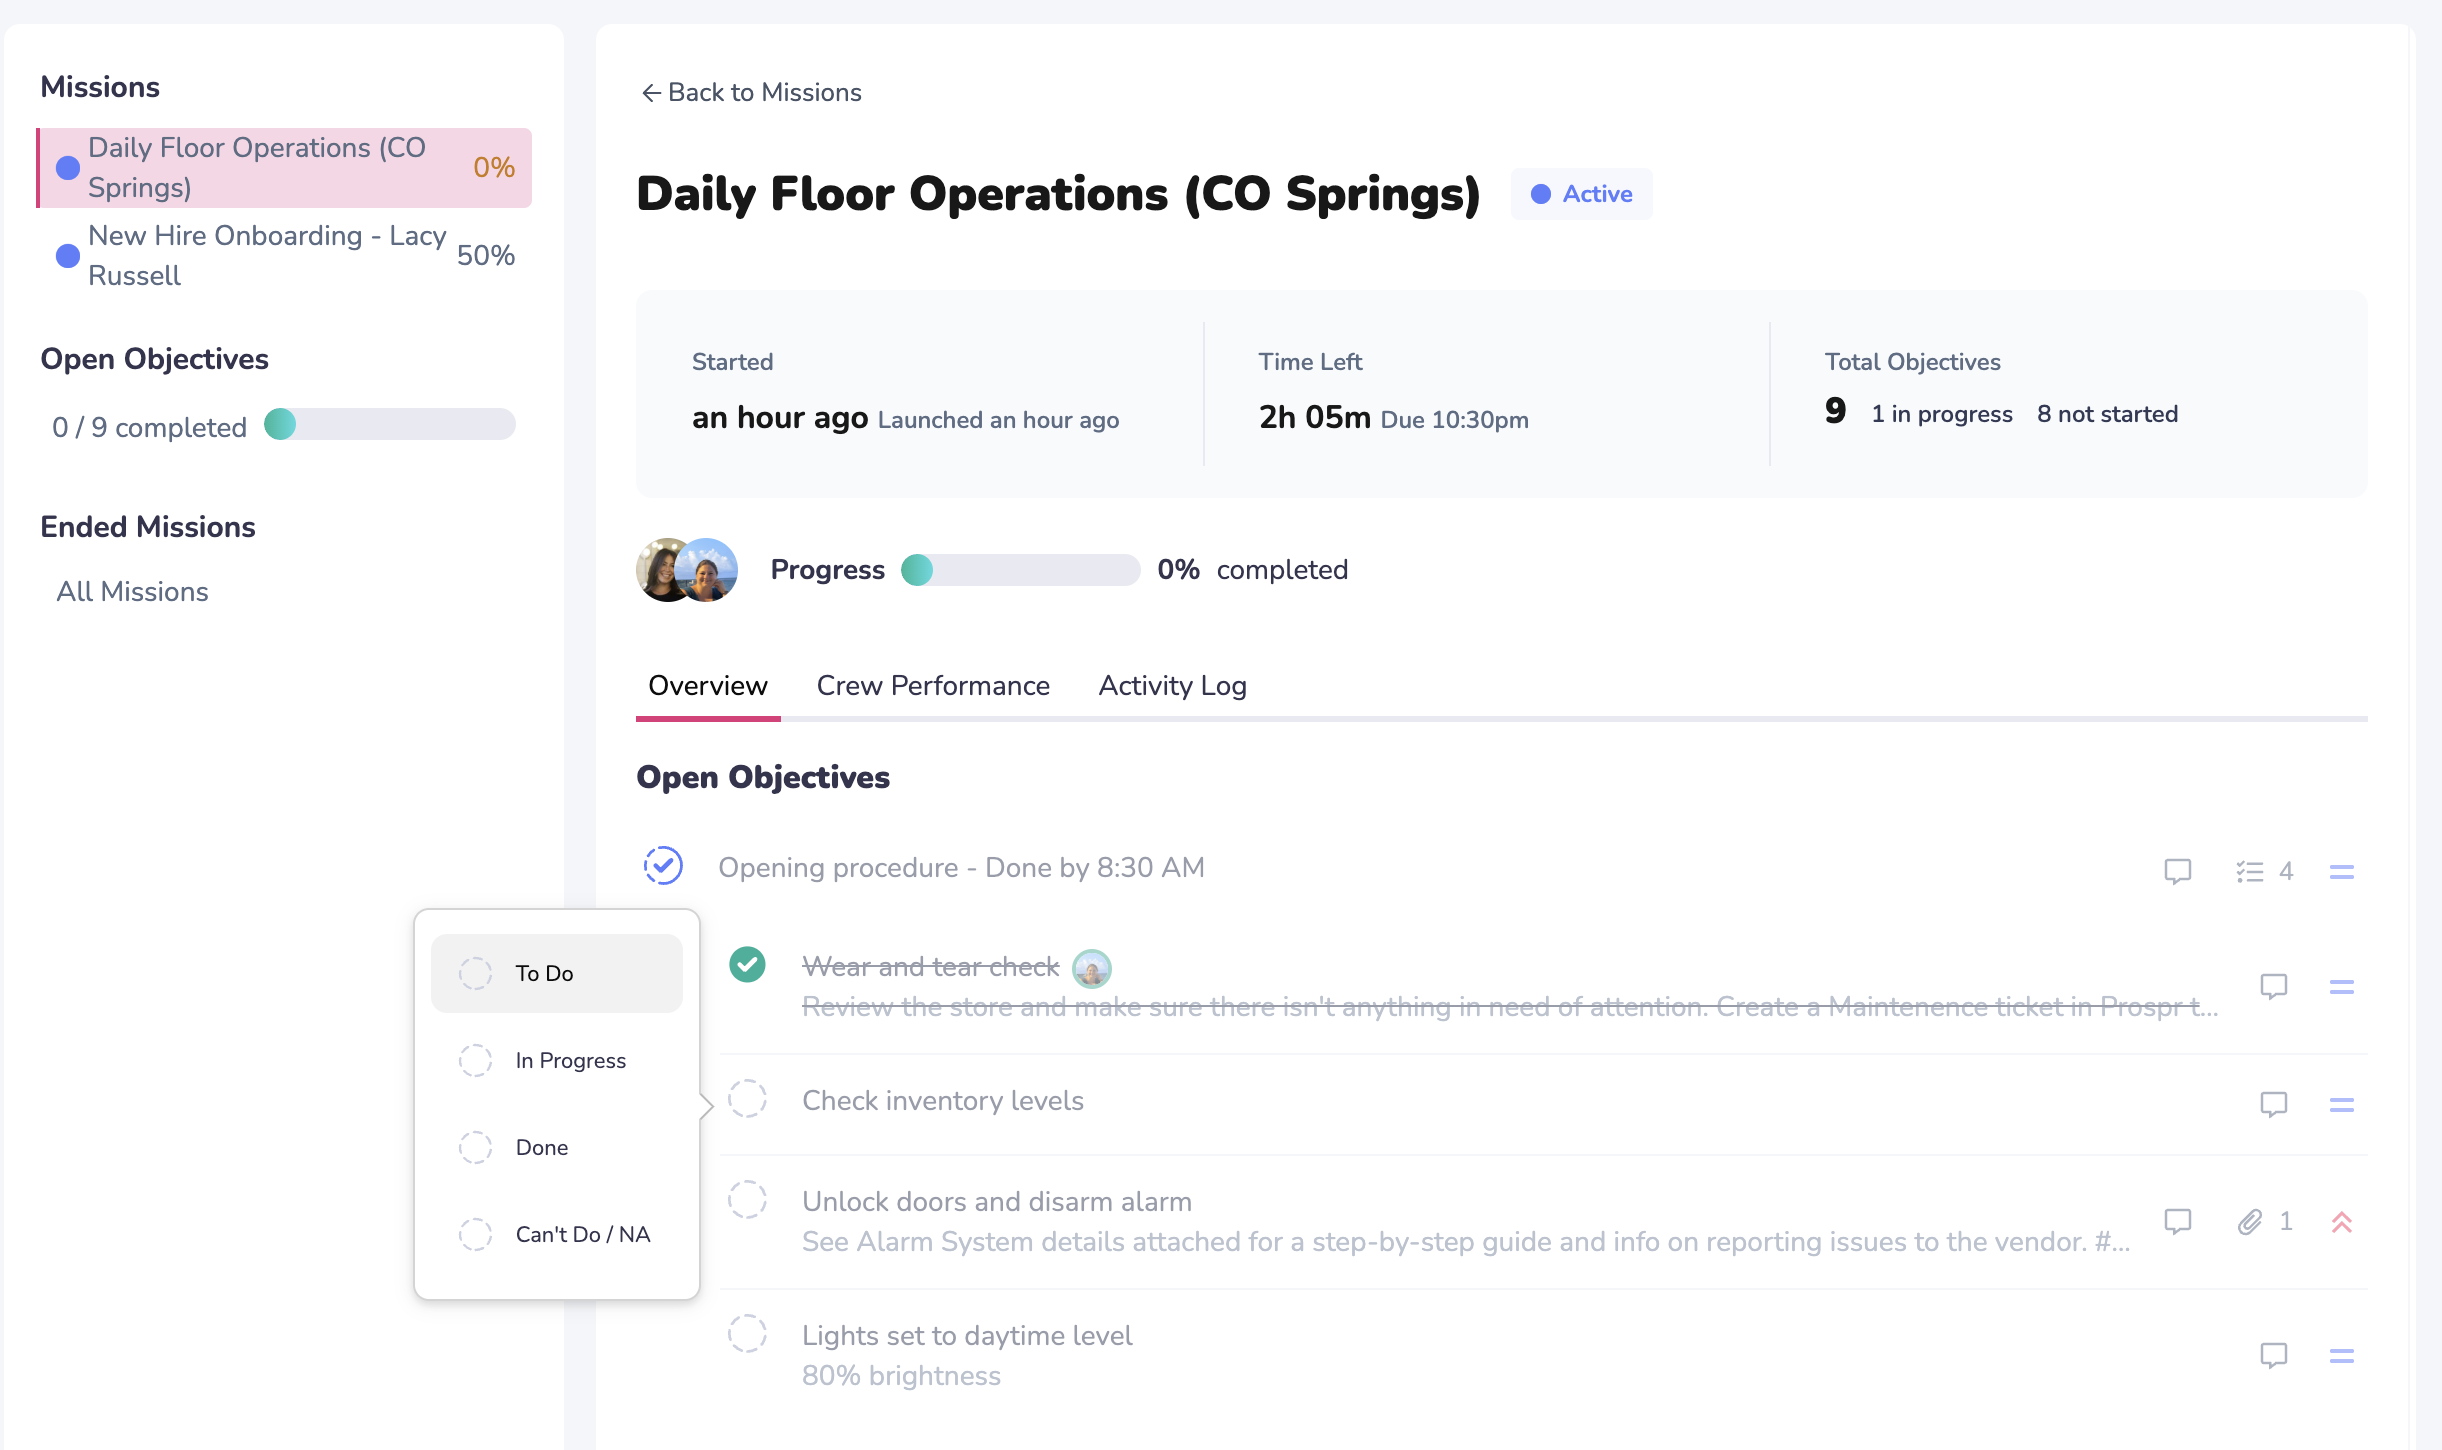
Click any objective or subtask to view the task description, comments, add your own, see activity history, or upload attachments and photos.