1) Use your app menu to navigate to “Tickets”.
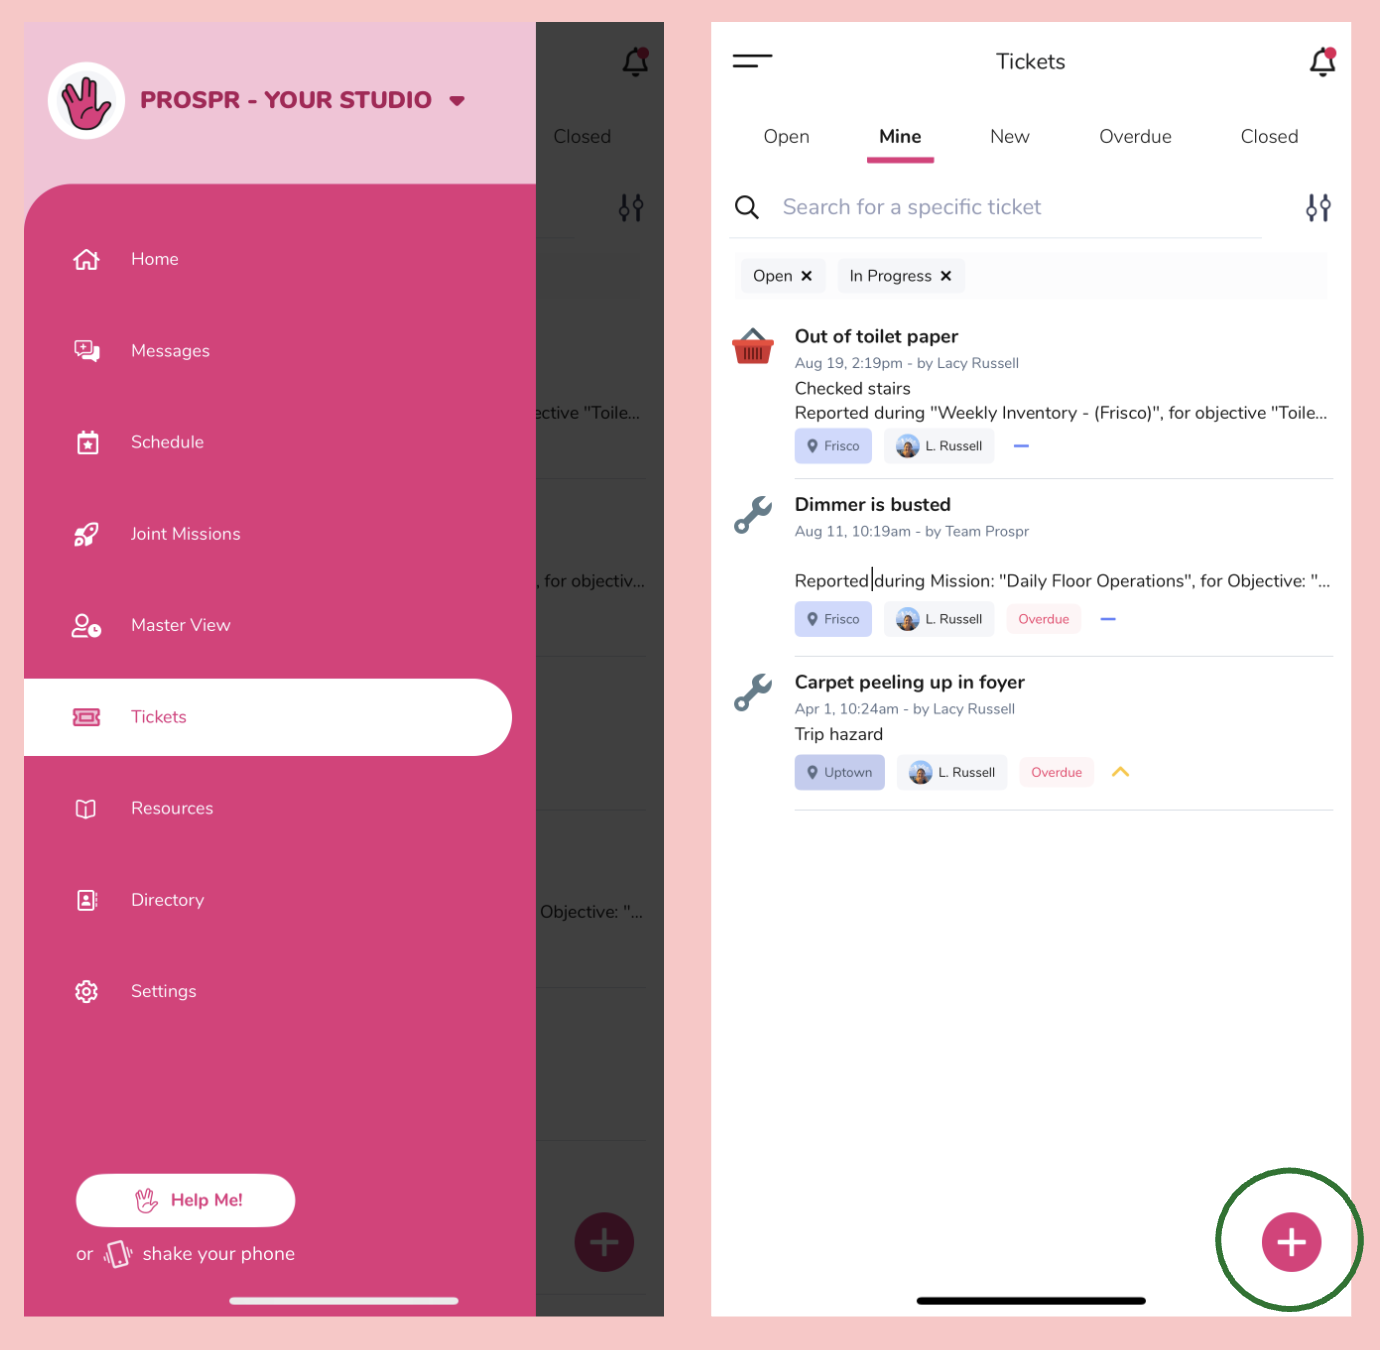
2) In your Ticket Inbox, click on the plus button in the lower right corner of your screen.
3) In the pop-up menu, begin filling out the details of your Ticket.

Ticket Type - The type of item that you are reporting on.
Select Location - The location/store/etc. that you are submitting the Ticket for.
Priority - How important is the Ticket? Low, Medium, High, or Critical.
Subject + Description - Enter the details of what you are sharing.
Attachments (optional) - Take a photo or add a photo from your camera roll to include on your Ticket
Other (optional) Due Date & Assignee - If there is a specific person who will be taking care of this Ticket, search and assign it to them here. You may also add a due date here.
4) Tap on "Save" to enter your Ticket.
Learn more about managing your Ticket inbox, including those assigned to you below:
Your Ticket Inbox
Your command center for all things ticketing
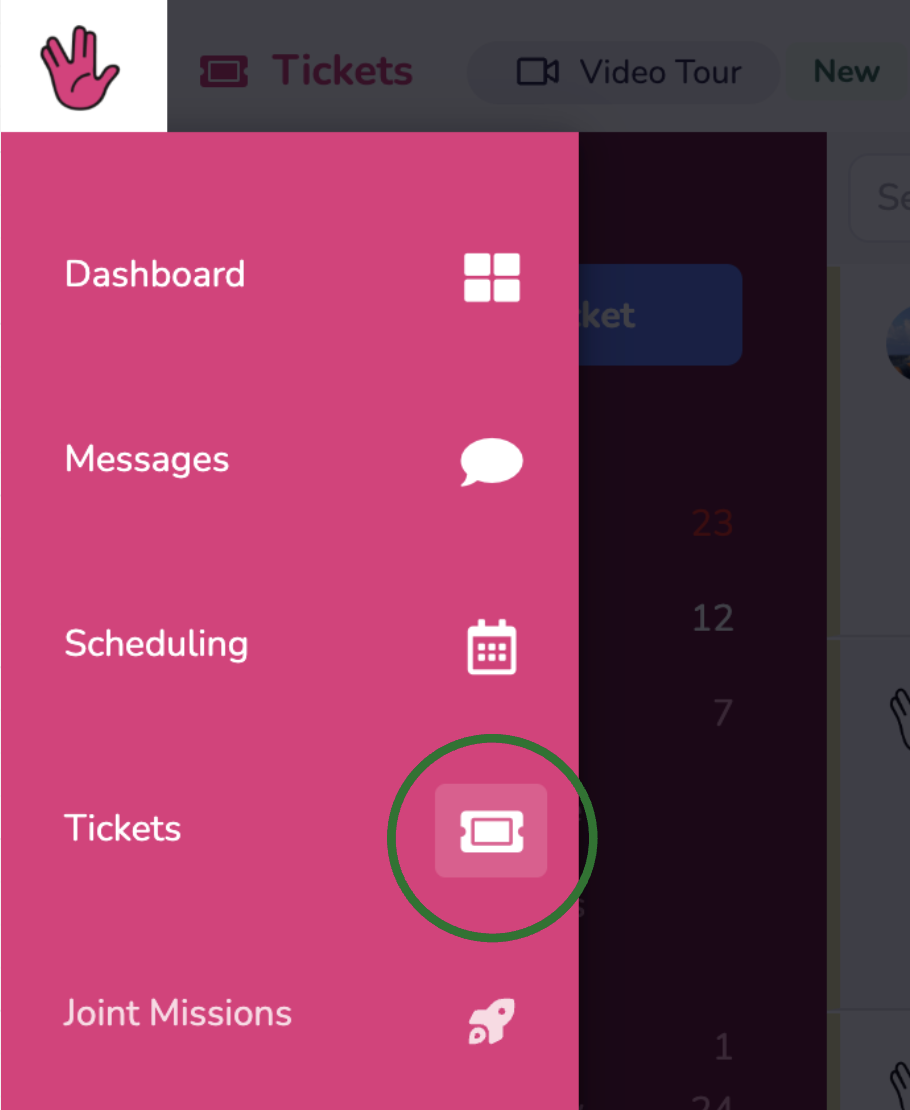
1) Using your menu, navigate to “Tickets”.
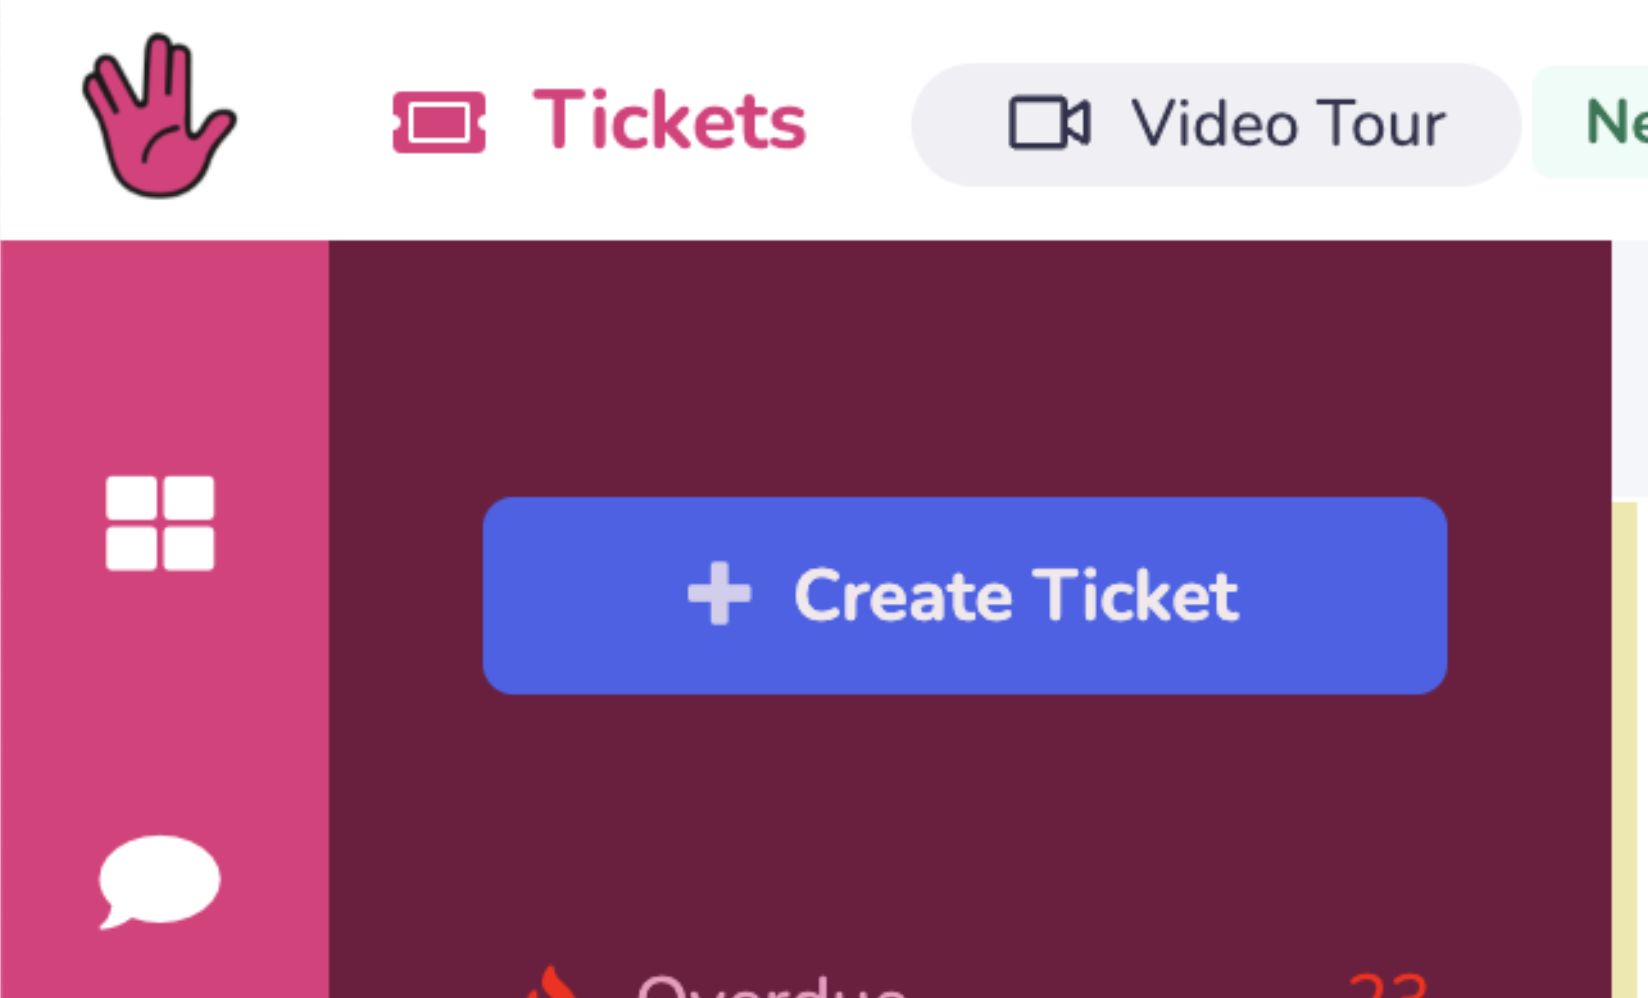
2) Near the top left of your screen, click on "+ Create Ticket."
3) In the pop-up menu, fill out the fields to create your Ticket.
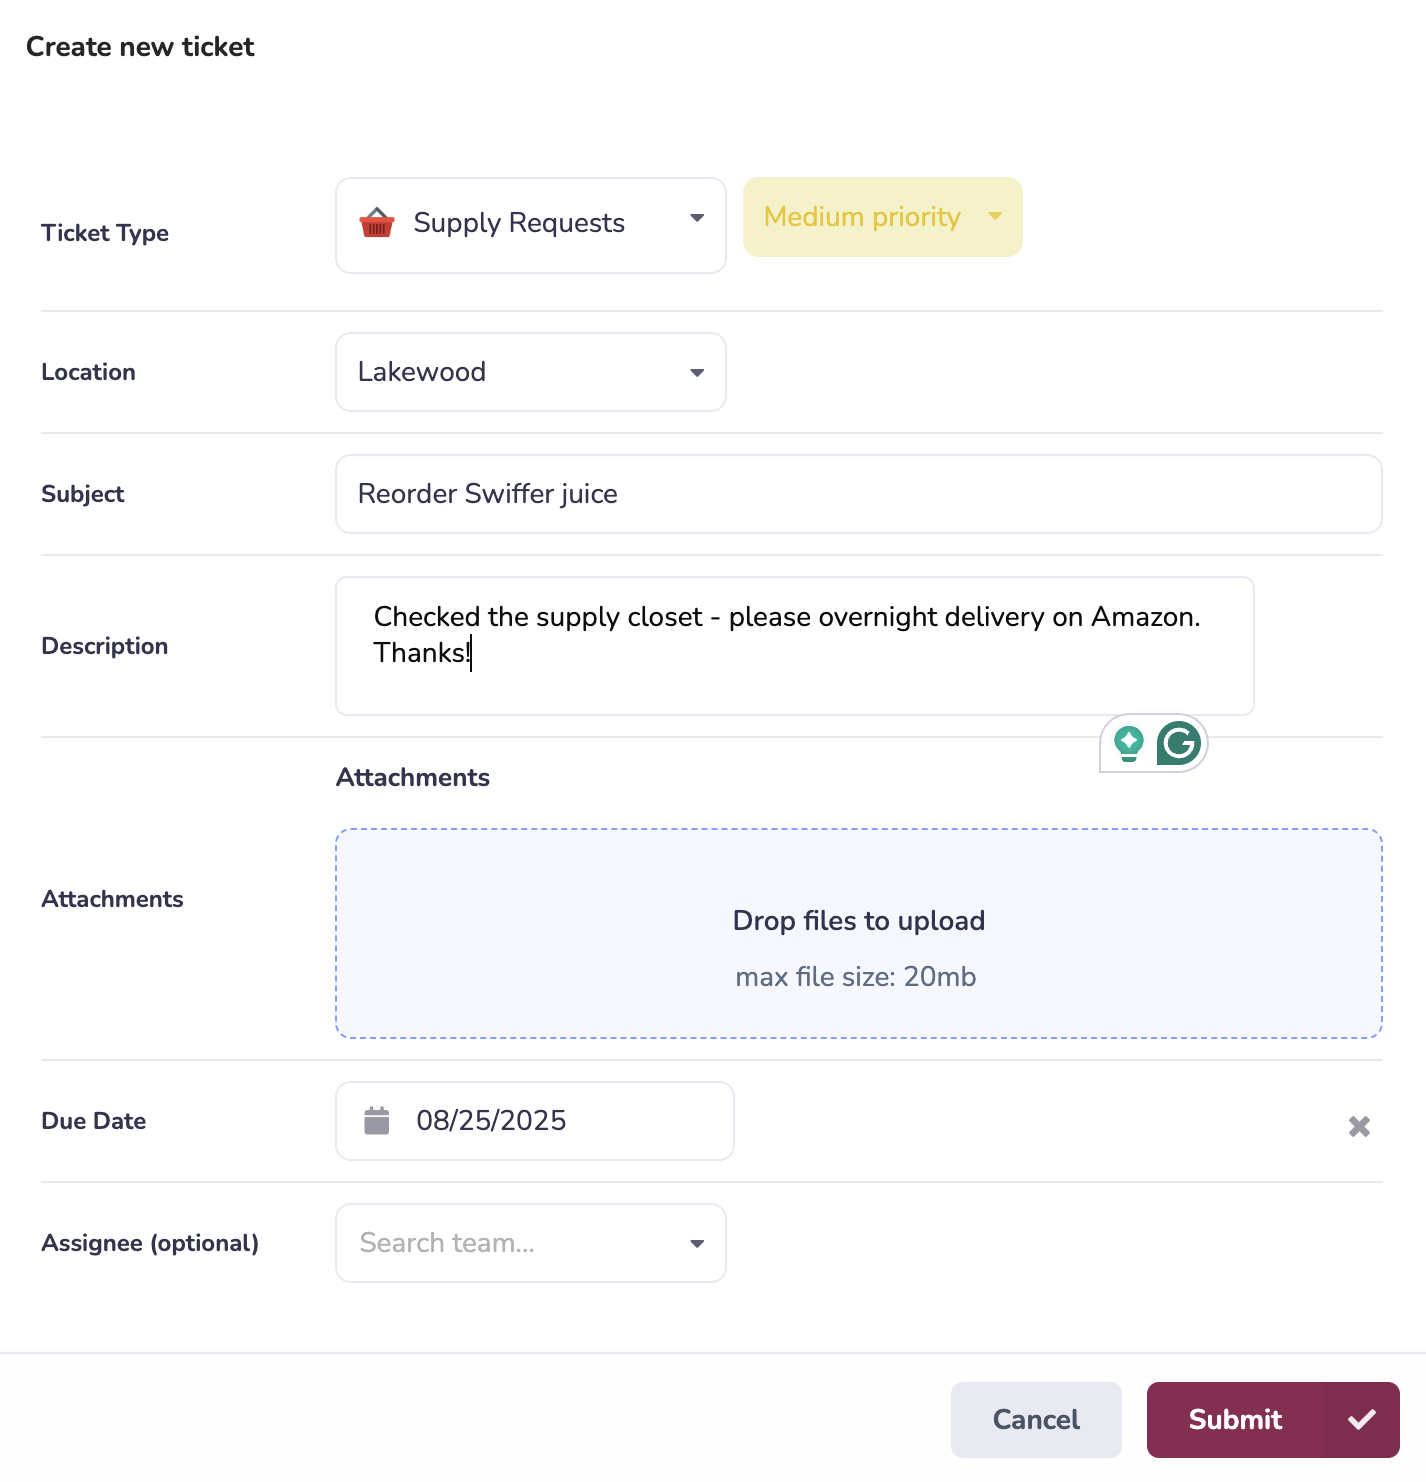
Ticket Type - The type of item that you are reporting on.
Priority - Use the dropdown to select the importance of the Ticket. Low, Medium, High, or Critical.
Location - The location/store/etc. that you are submitting the Ticket for.
Subject + Description - Enter the details of what you are sharing.
Attachments (optional) - Take a photo or add a photo from your camera roll to include on your Ticket.
Due Date (optional)
Assignee (optional) - If there is a specific person who will be taking care of this Ticket, search and assign it to them here.
4) Click "Submit" to enter your Ticket.