company logo

Help center

Go to Prospr
All collectionsUser ManagementAdding & Disabling UsersHow to Disable or Re-enable a User's Account

How to Disable or Re-enable a User's Account

Schedule a termination date or change a user's account status

info icon
Note: Users must have accepted their Prospr invite to be "Active", or available to "Disable"

Inviting New Users

Getting new users into Prospr

Disabling | Web

1) Find the user by going to "Settings" > "Users", and then searching for their name.
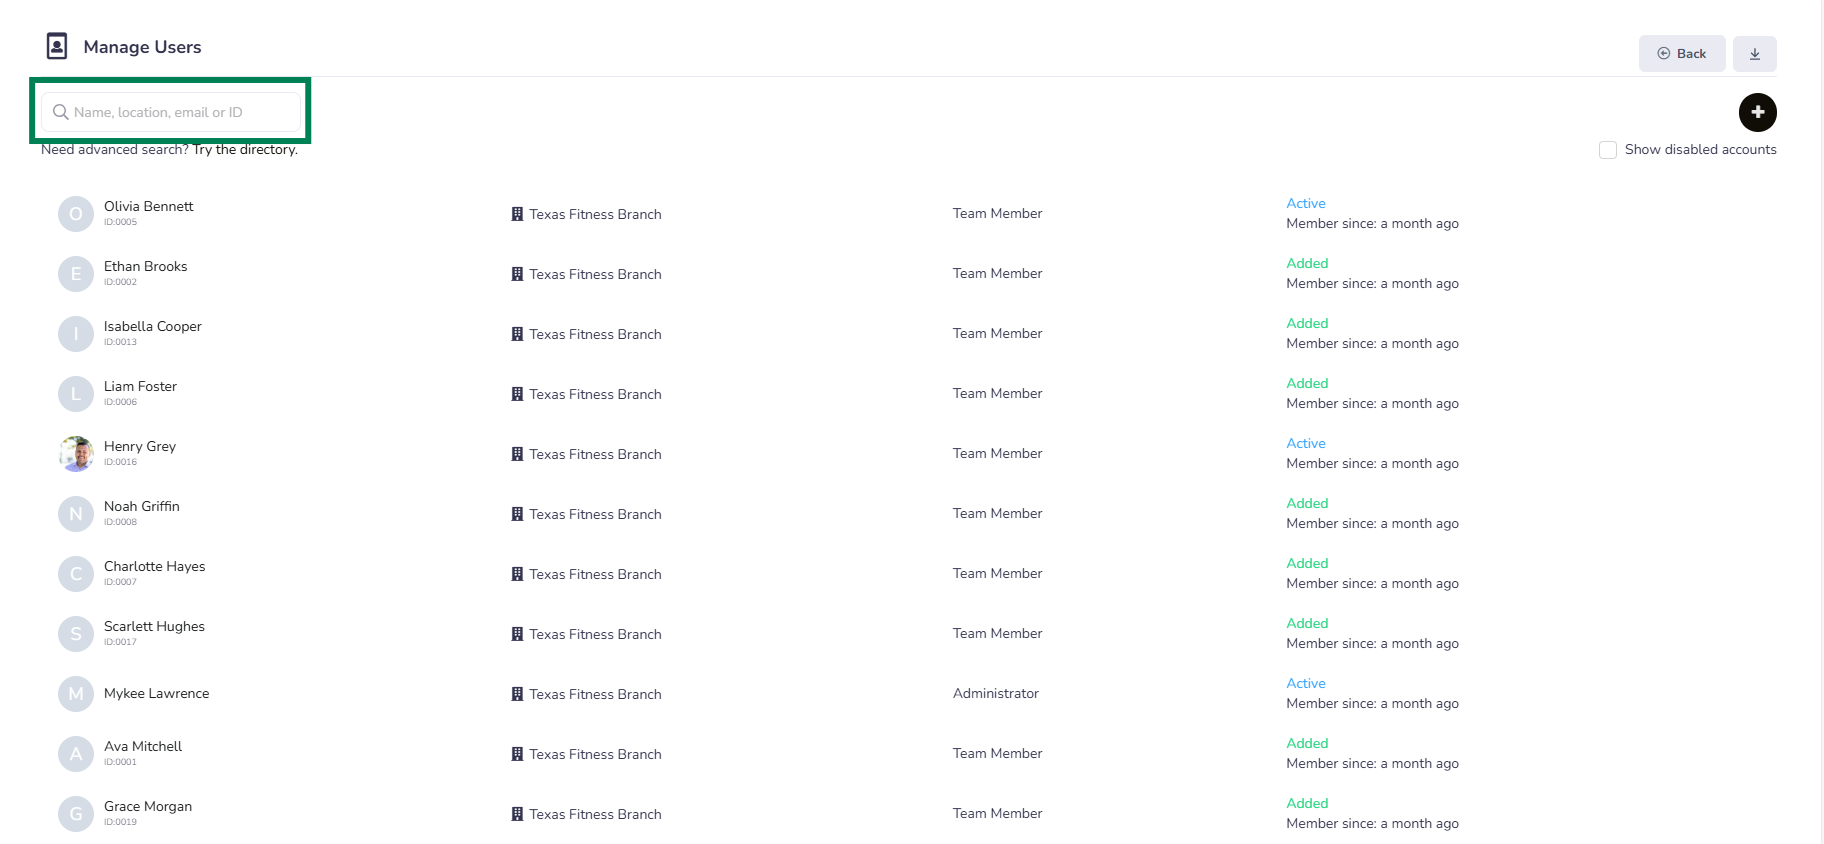
2) Click on the active user to open their profile.

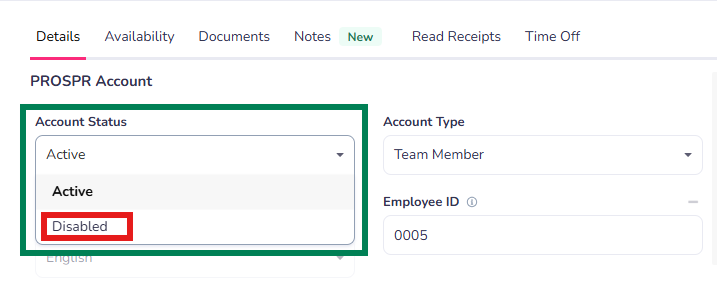
3) Under "PROSPR Account" you will find the "Account Status" dropdown. Change this from "Active" to "Disabled"
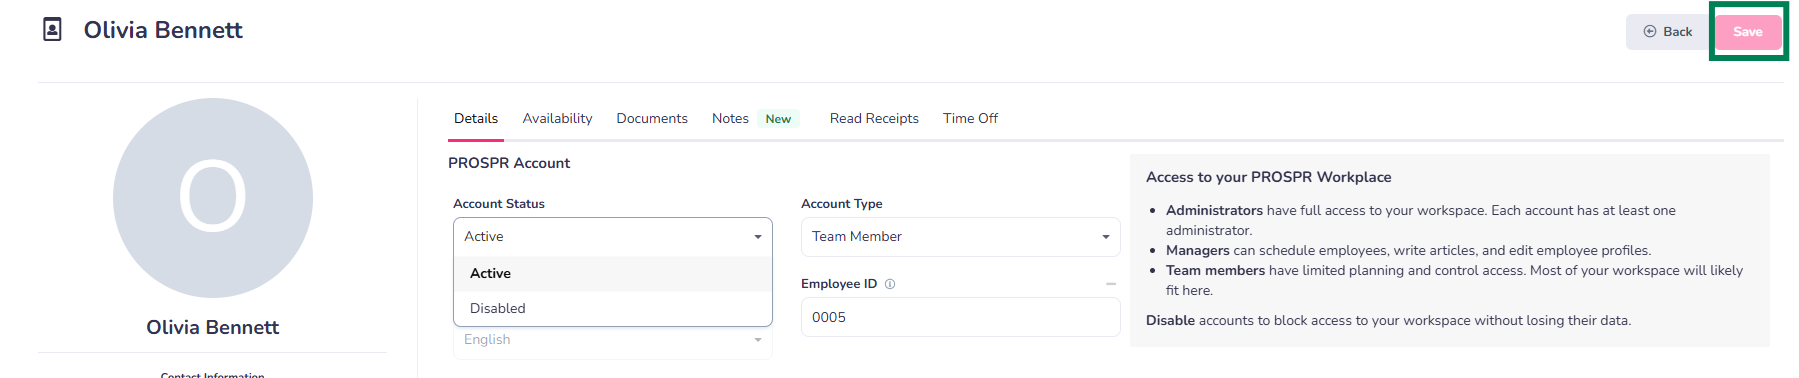
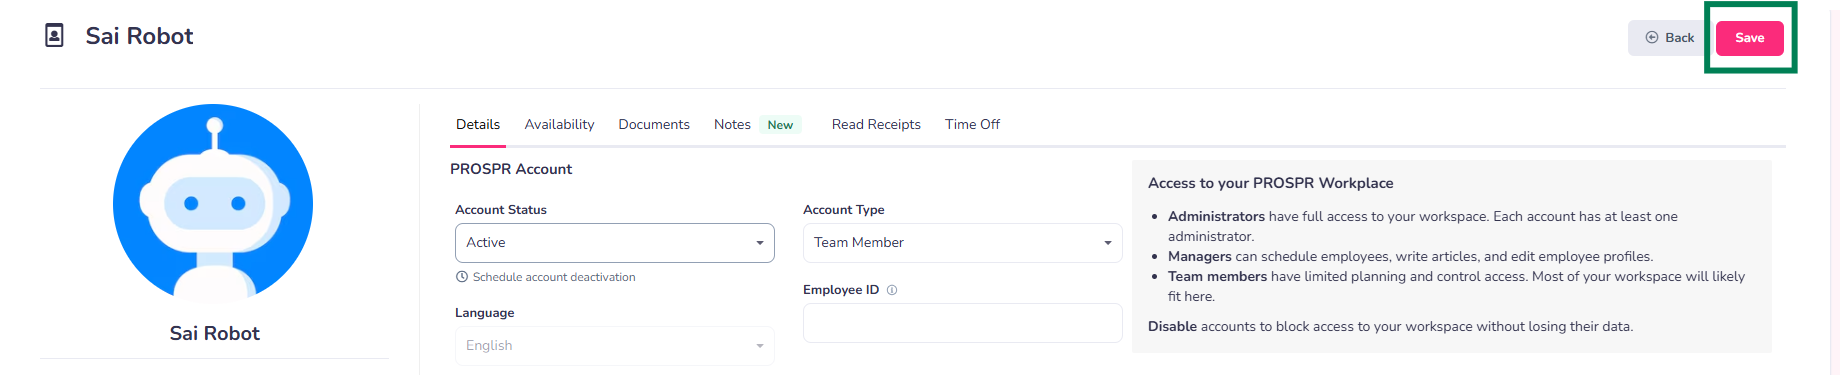
4) Click "Save" in the top right corner.
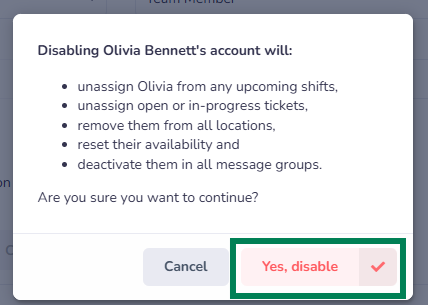
5) You will receive a final confirmation/warning. Click "Yes, Disable" to complete disabling the user's account.
warning icon
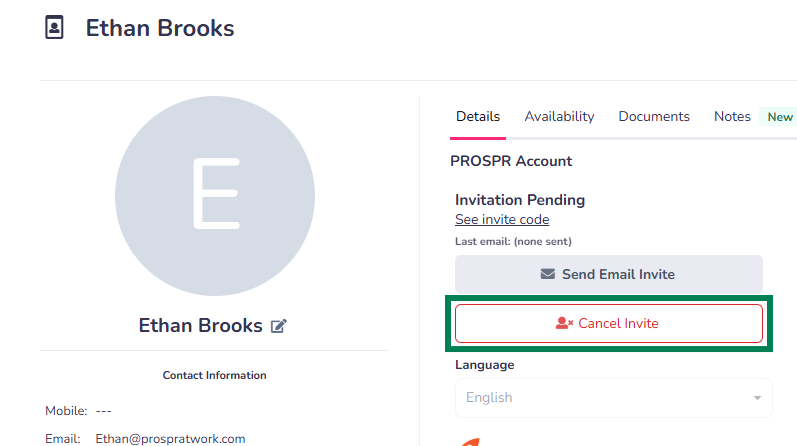
If you need to cancel an invitation because a user never joined Prospr, you can do so in the same place, however, you will choose to "Cancel invite" instead of changing their status. Invitations may only be canceled from the Web app.
info icon
Note: Disabling a user's account removes their access to your Prospr Workspace.

They will be removed from all shifts, removed from group chats and tickets, and will be unable to log in to your Workspace. You can reenable a user's account at a later time, which we will detail at the end of this article.
success icon
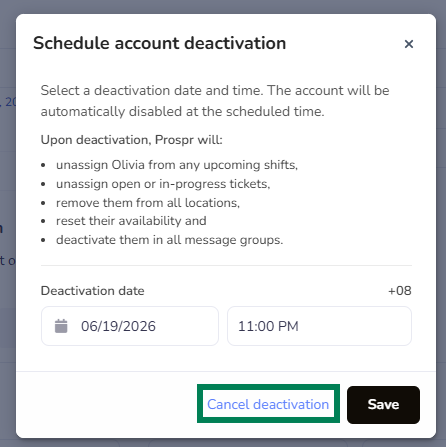
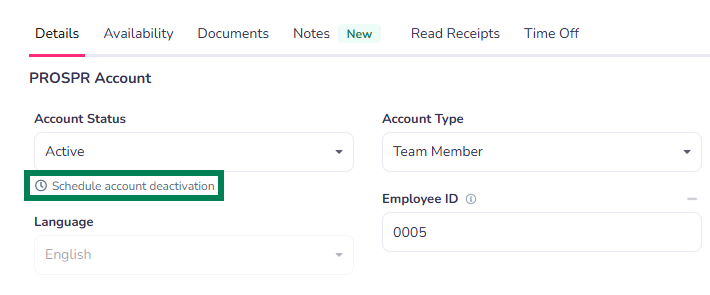
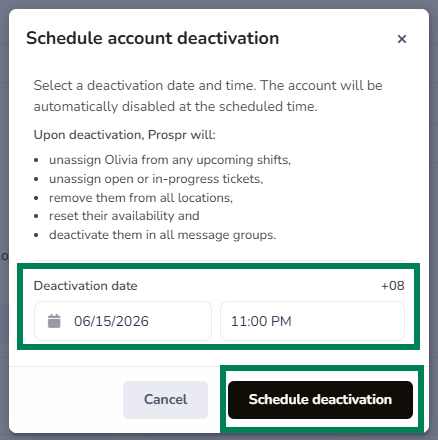
NEW!! Select a deactivation date and time. An account can be scheduled to be automatically disabled for a future time.

On the selected deactivation date, Prospr will automatically remove the user from future schedules, unassign open or in-progress tickets, clear their Locations and availability, and deactivate them from all message groups.

Set Schedule Deactivation | Web

  • Click “Schedule account deactivation”
  • Set the deactivation date and time then click “Schedule deactivation”
Cancel Scheduled Deactivation | Web

  • Click “Schedule account deactivation”

  • Click “Cancel deactivation”

Disabling | Mobile App

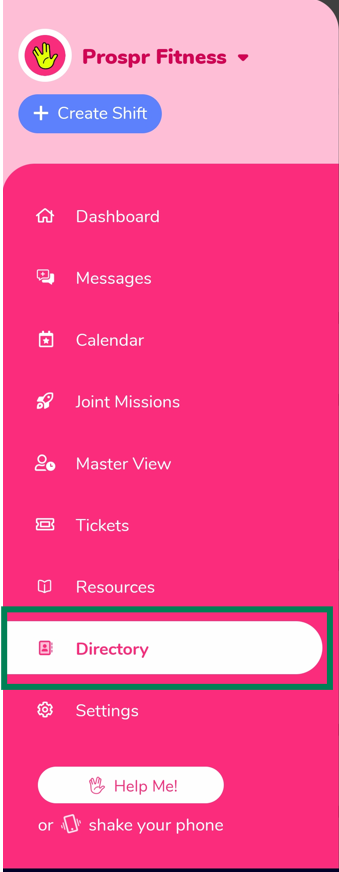
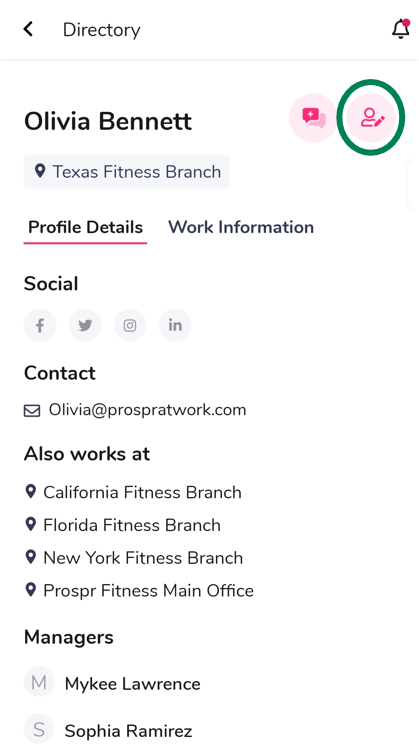
1) From your left-hand menu, select "Directory"
2) Locate the User you wish to modify and tap their name.
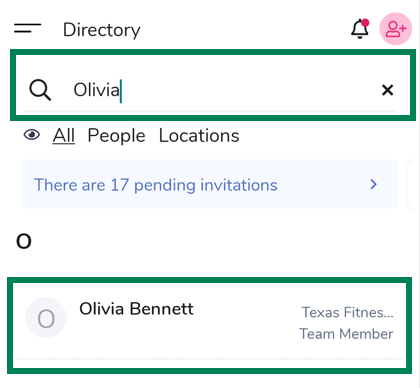
3) To edit, tap the button with the user icon and a pencil.
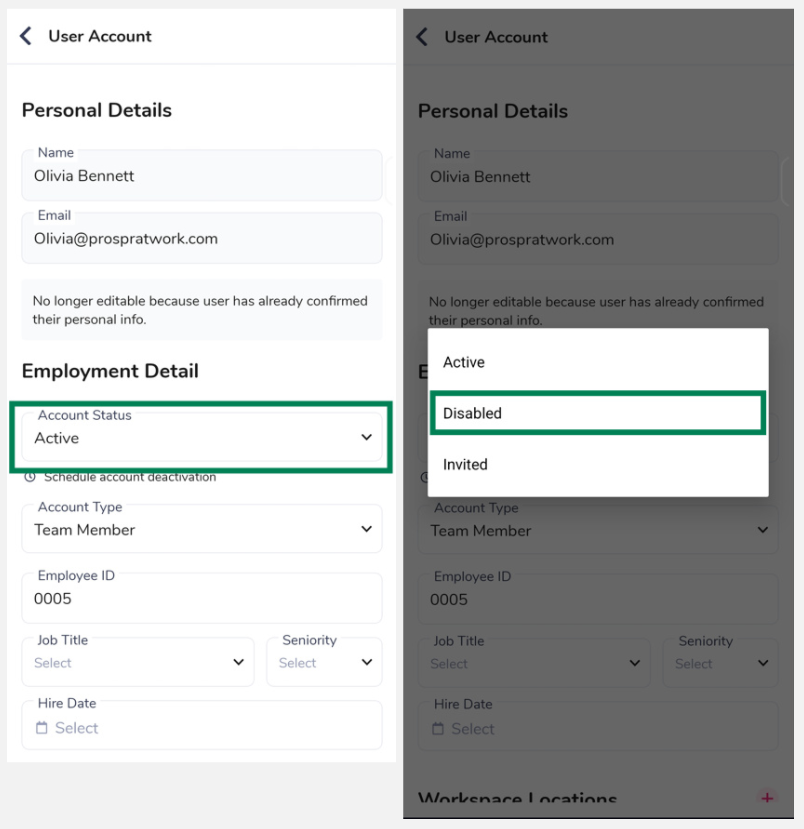
4) Change the Employment Detail Account Status dropdown to "Disabled".
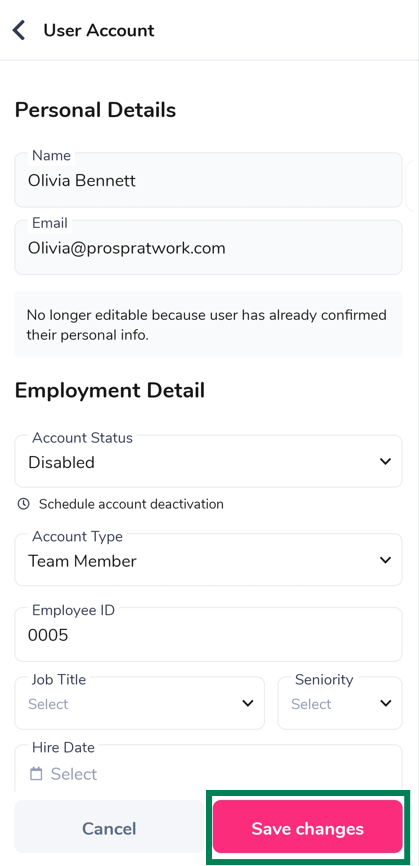
5) Don't forget to hit "Save changes" when you're done!
success icon
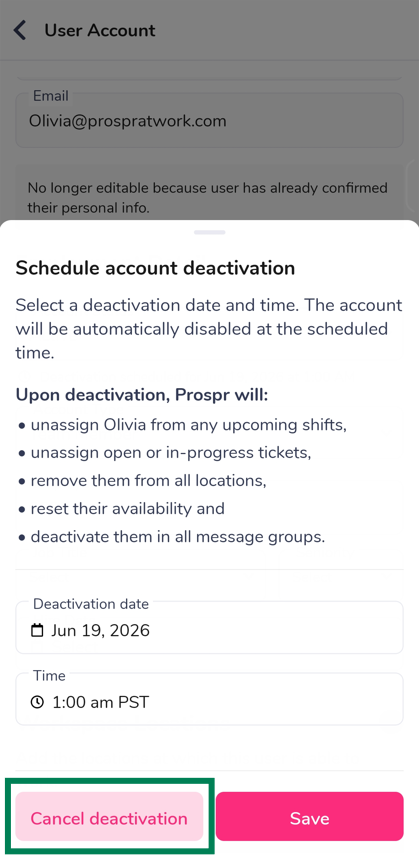
NEW!! Select a deactivation date and time. An account can be scheduled to be automatically disabled for a future time.

On the selected deactivation date, Prospr will automatically remove the user from future schedules, unassign open or in-progress tickets, clear their Locations and availability, and deactivate them from all message groups.

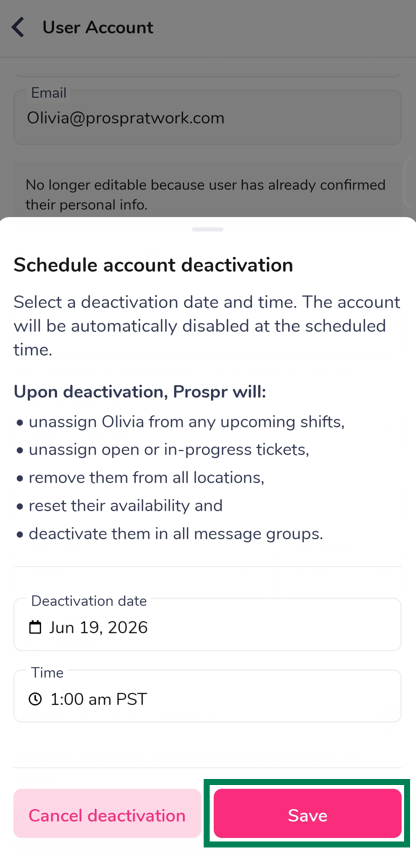
Set Schedule Deactivation | Mobile App

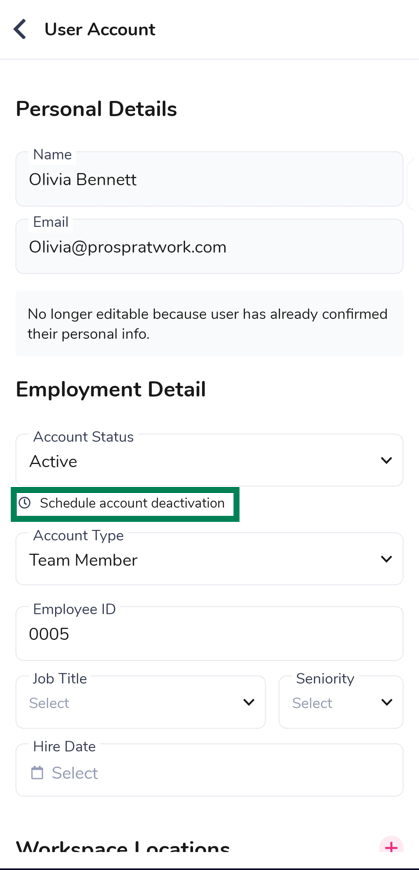
  • Tap “Schedule account deactivation”

  • Set the deactivation date and time then tap “Save”
Cancel Scheduled Deactivation | Mobile App

  • Tap “Deactivation scheduled for Date/Time”
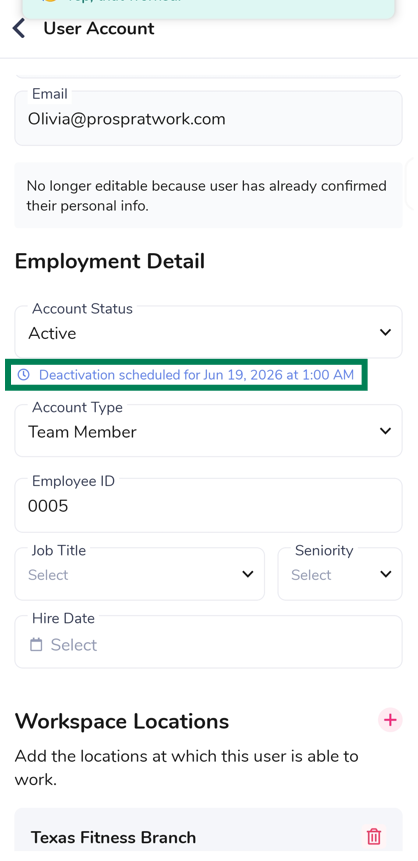
  • Tap “Cancel deactivation”

Re-enable a Disabled User

error icon
Please note:
This may only be done via the Web App.

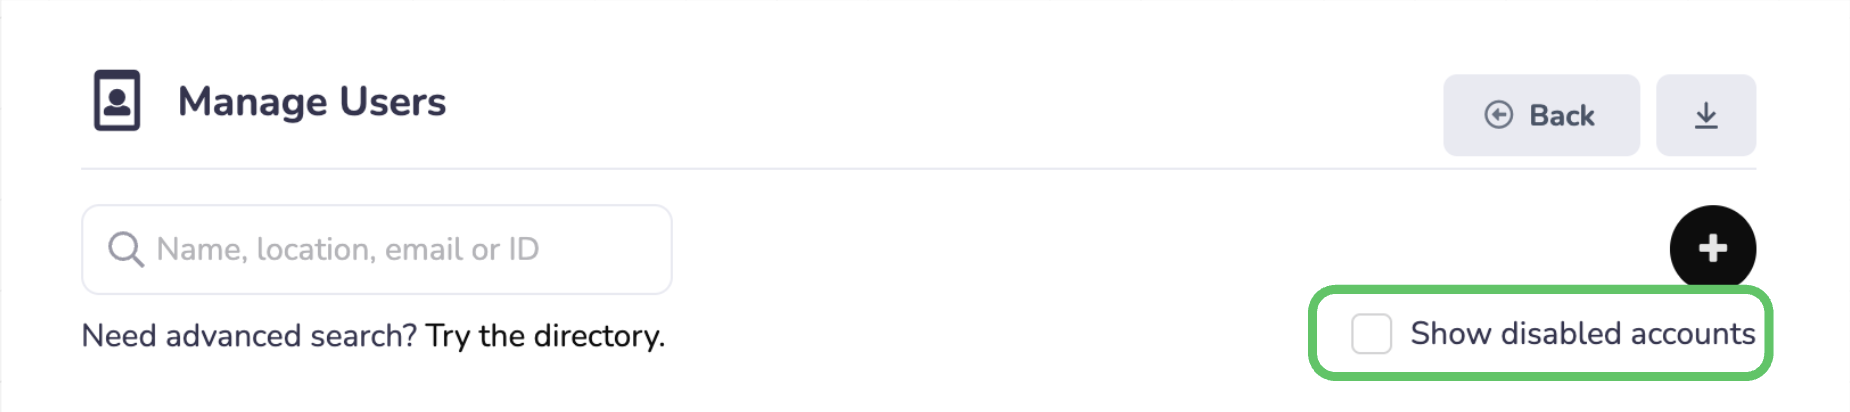
1) On the "Manage Users" screen (Settings > Users), click on the box to "Show Disabled Accounts" at the top right.

  • If you receive an error that someone is already part of your workspace but you don't see them at first, check the "Show Disabled Accounts" box.
2) Search for the user you want to reinstate.

  • Please note that if you have a Manager-level login, you may need to search for their full first and last name.

3) Click on the user to open their profile, and change "Account Status" from "Disabled" to "Active”

4) Click "Save"

Did this answer your question?
😞
😐
😁